How to Backup and Restore your /e/OS phone
This documentation intends to help /e/OS users, backup and restore their device
A difference in the encryption system between Android 9 and subsequent android versions prevents this device from being upgraded to Android 10+ without a factory reset.
Requirements
- /e/OS phone
- Computer (Linux, Windows, macOS)
- USB cable
- Some time : 2-3 hours, if you want to re-install /e/ OS
Step 1: Back up your data
Task 1: Back up files (Photos, videos and documents)
You need to transfer your files from the phone to a computer.
Connect your phone to a laptop using a USB cable.
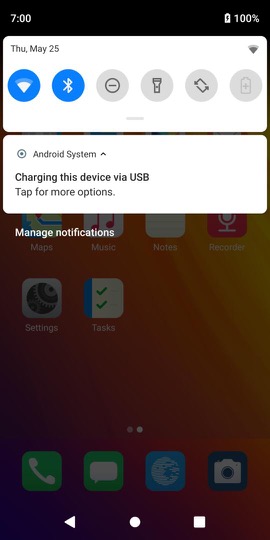
Slide your finger from top of the screen downwards, and click on “Android System. Charging this device via USB” 2 times.You will see USB preferences menu. Select File transfer. If you don’t see this option, try using another cable or another USB port on your computer.
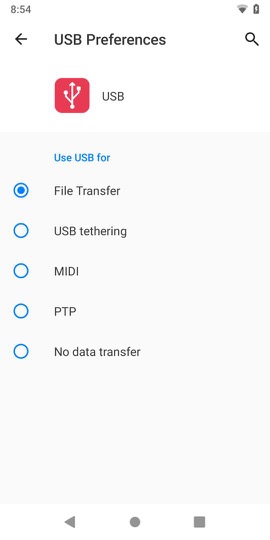
You will now see the phone storage as a folder in the file explorer of your PC. You can browse the files on your phone. You can copy all folders, or you can choose which folders to copy, e.g.: DCIM Music Pictures etc.
note: If you are using MacOS, you will need to download and install the Android File Transfer app for macOS. The Android File Transfer can be found at this address: https://www.android.com/filetransfer/
Task 2: Back up your Calendar(s)
It is not possible to back up a local calendar. If you are using an online calendar, such as if you use a Murena Workspace account or Nextcloud based account, the online calendar will appear again after adding your account in the /e/ OS after the installation of the OS.
Task 3: Back up your Contacts
Open Contacts app.
Click on 3 lines icon.
Click on Settings.
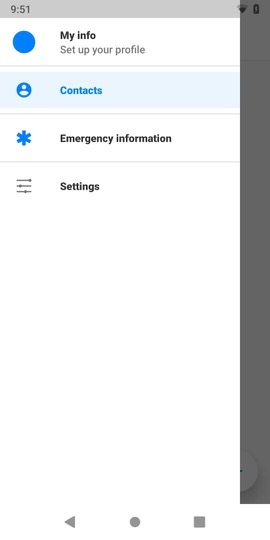
Click on Export.
Click on Export to .vcf file.
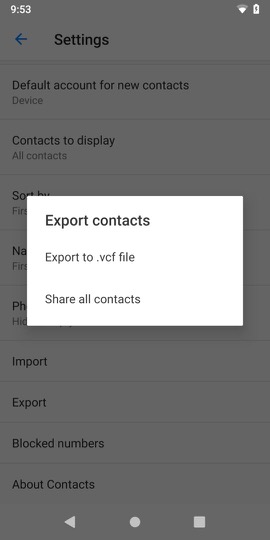
Choose a folder where you want to save the .vcf file, for example the “Download” folder. Click save, then copy the file to a computer, like in Step 1: “Photos, videos and documents”.
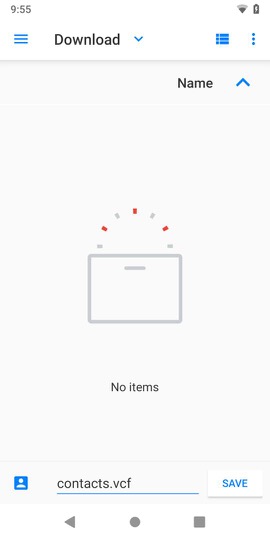
Task 4: Back up your SMS/MMS and call logs
It is not possible to save SMS/MMS, neither call logs, with integrated default apps. That’s why we advise users to use SMS Backup and Restore:
- Open
Apps - Search and install
SMS Backup & Restore - Open the app, and create a backup
- Copy the backup files (calls-[date].xml and sms-[date].xml) on your computer
Task 5: Back up Notes
If your notes are already on Murena Workspace, there is no need to backup them. However if your notes were saved as local notes:
- Go to Notes
burger menu>Settings>Export notes> chooseaccountorlocal>export - Your notes are saved in
Internal_Storage/Notes/account name, as separate files.Savethem.
Task 6: Back up Signal
Please refer to the official Signal documentation
Task 7: Back up WhatsApp
The official WhatApp documentation relies on a Google account to backup data: Whatsapp backup and restore documentation
You can refer to the community discussion which provide useful guidelines.
Task 8: Back up applications and application data
It is not possible to make a direct backup of applications with the app data. We can offer an alternative to back up user installed apps.
- For apps that sync data without an account, your settings won’t be saved, so you will have to configure them again after the upgrade.
- For apps that sync data with an account, you will just have to connect your account again.
To back your apps up, you can use a third party app called Package Manager from Apps.
Once you have launched Package Manager, you will see apps organized by type (All, System, User). You want to focus on User apps, which are the ones you installed on the phone.
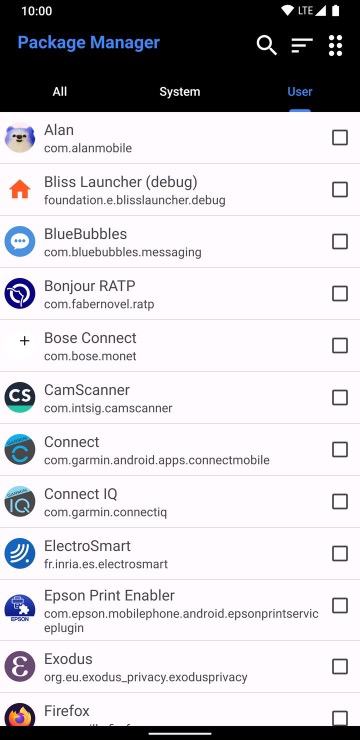
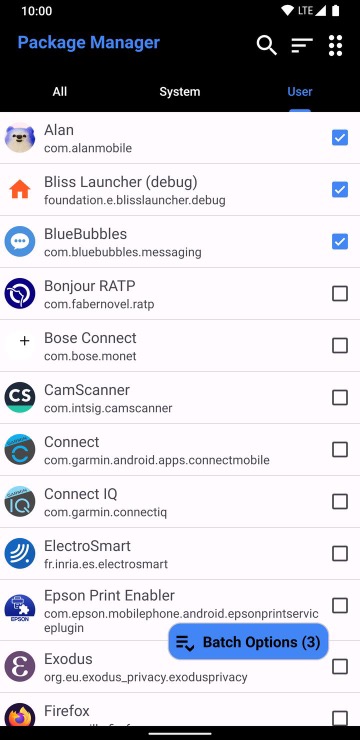
To select all User Apps, tick one app to select it then tap on Batch Options and Select All. The Batch options button will now have a number next to it, counting the number of selected apps.
Now press the Batch options button again and select Export.
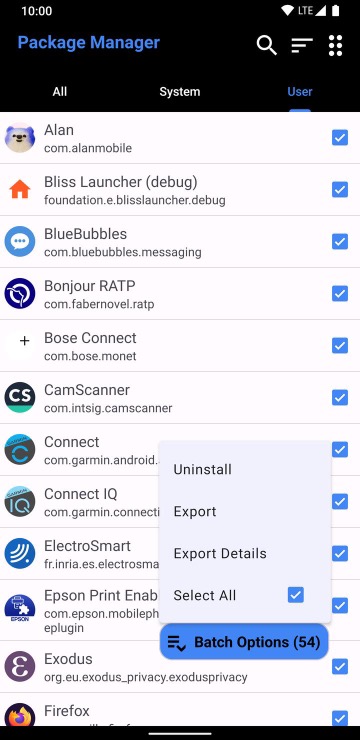
You will be prompted to confirm before you export the files.
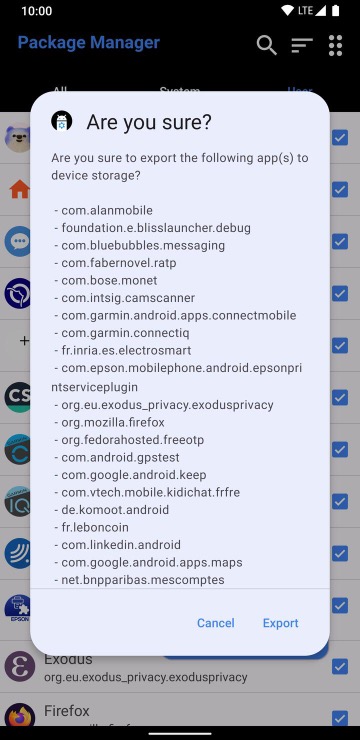
Once you have confirmed, the export will start.
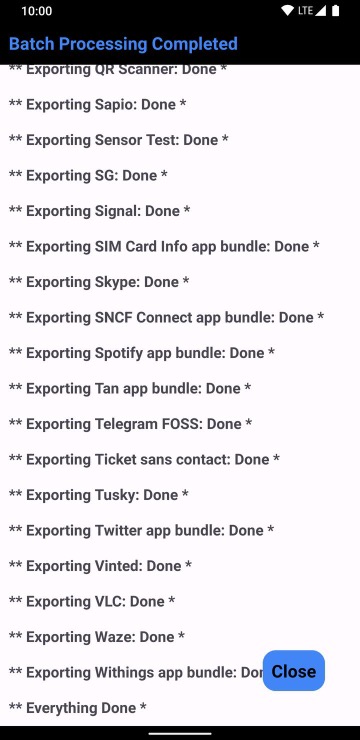
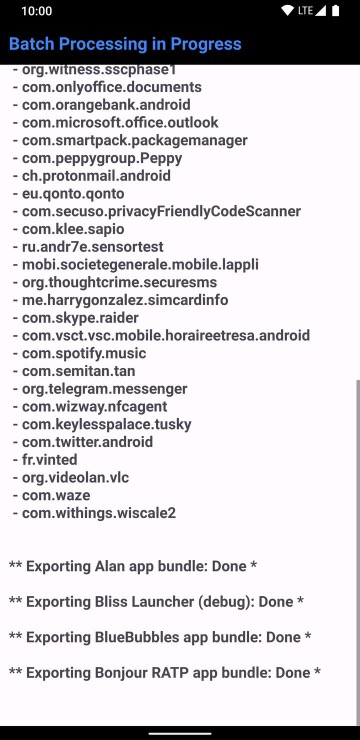
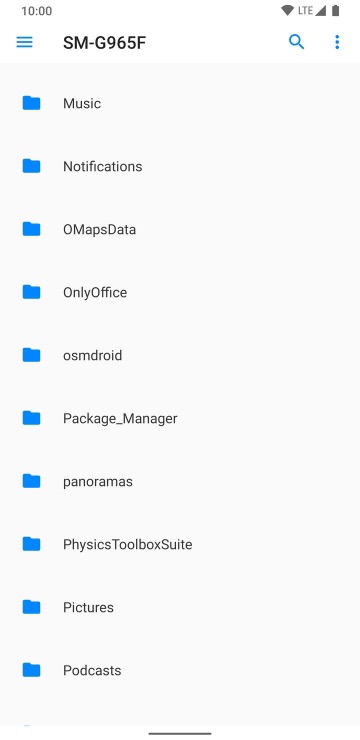
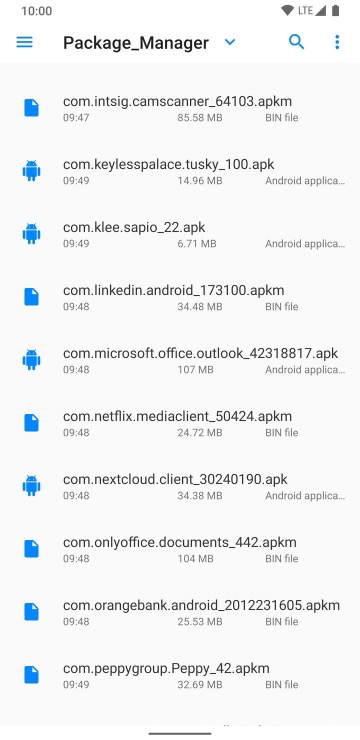
The exported apps will be located under the folder /Package_Manager/ on your device.
Please copy all files to your computer.
Step 2: Restore your data
Task 1: Restore files (photos, videos and documents)
Transfer files from the computer onto the phone.
You can copy the data back to your phone, by doing the same steps in the “Transfer files from the phone to a computer” section, then copying the files or folders from the computer and pasting them onto the phone in the right directory.
Task 2: Restore Calendar(s)
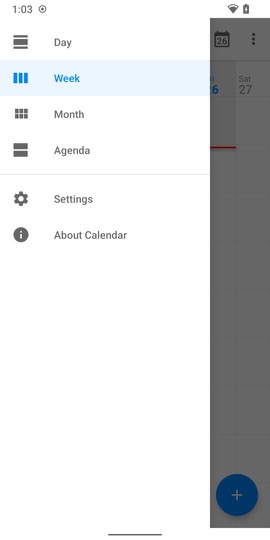
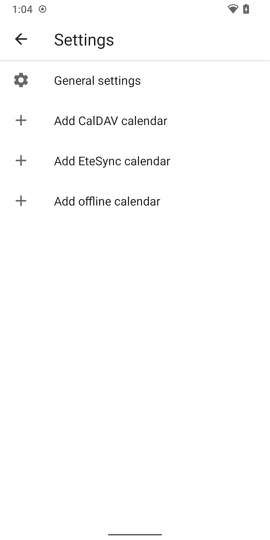
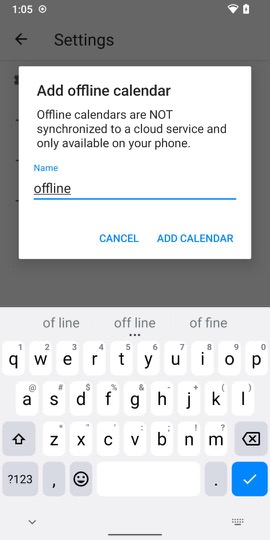
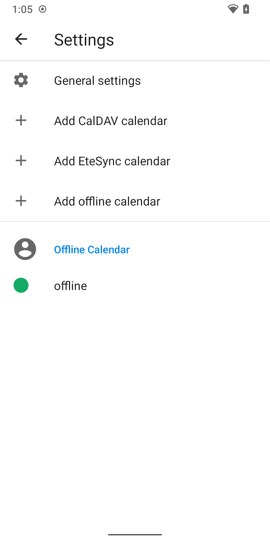
You cannot restore a local calendar. If you add a Murena Workspace account, related calendars should appear automatically on your phone. You can also create a new local calendar if you like. To do so, click on 3 lines on top left > Settings > Add offline calendar > Add calendar.
Task 3: Restore Contacts
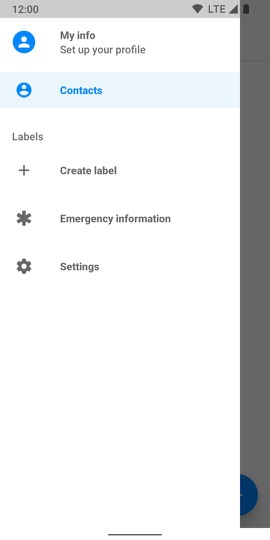
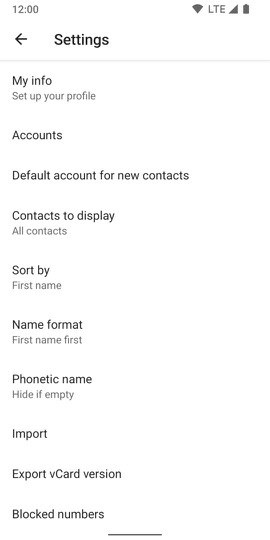
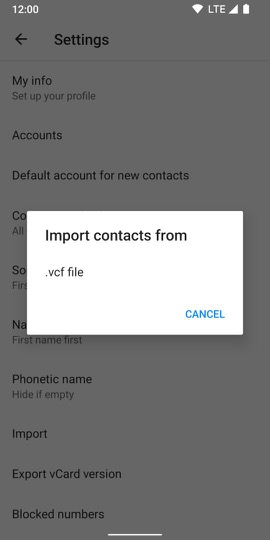
Copy the contacts backup file to the phone, for example in “Download” folder. Open Contacts app, click on 3 lines > Settings > Import : .vcf file , then select the backup file.
Task 4: Restore your SMS/MMS and call logs
We advise to use SMS Backup & Restore:
- Copy the backup files (calls-[date].xml and sms-[date].xml) from your computer on the Fairphone 3
- Open
Apps - Search and install
SMS Backup & Restore - Open the app
- Tap
Restoreon homepage, and follow the process
Task 5: Restore Notes
- If you have a backup of your Notes, which are not already on Murena Workspace, upload your Notes files on murena.io.
- Go to https://murena.io/apps/files/files
- Click
Notes folder,+new>upload files, anduploadthem. They should appear automatically in your account, and synchronized with your phone.
Task 6: Restore Signal
Please refer to the official Signal documentation
Task 7: Restore Whatsapp
The official WhatApps documentation relies on a Google account to restore data: Whatsapp backup and restore documentation
You can refer to the community discussion which provide useful guidelines.
Task 8: Restore applications and application data
To reinstall the apps, install Package Manager again.
Connect your phone to your computer and copy the exported apps to your phone in the folder Package_Manager.
Then open the menu on the top right and select Installer.
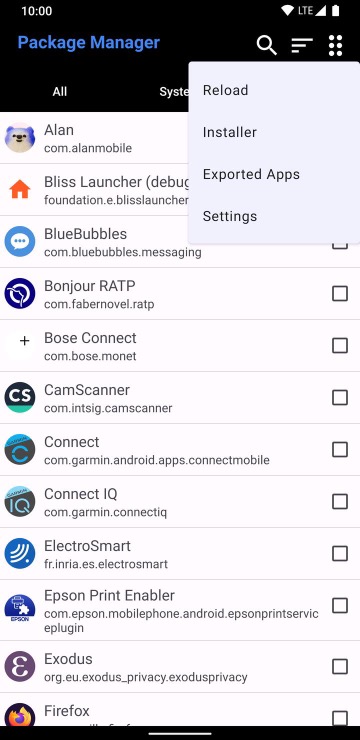
Check the instructions on screen and tap on +.
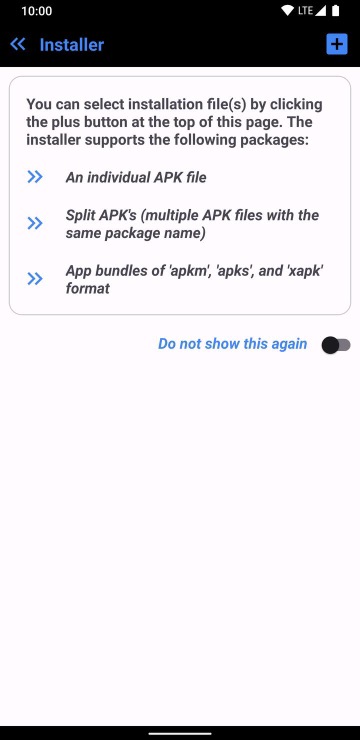
Search for the folder Package_Manager.
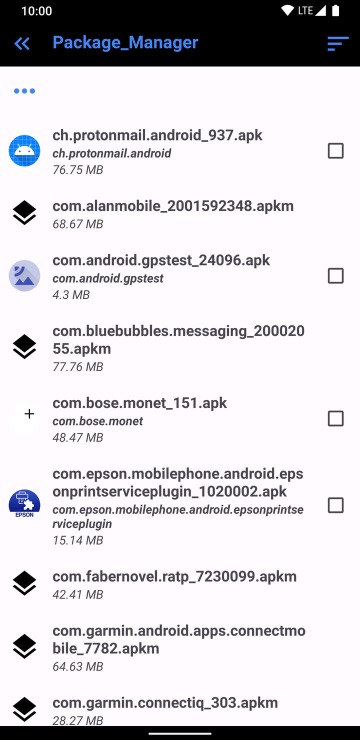
Tick the app you want to install and press the blue button Select.
A new screen will open giving you the option to install the app or cancel. Select Install and confirm the installation with the on-screen prompt.
Apps without the tick box will need to be installed individually.
You can now exit Package Manager
