Install /e/OS on Mediatek devices
Este guia irá ajudá-lo a instalar o /e/OS em dispositivos oficialmente suportados baseados na plataforma Mediatek.
Requisitos
- A supported device based on Mediatek. Check if your device is officially supported.
- A host machine (Linux or Windows).
- A data cable to connect your device to the host machine. A charging-only cable won’t work.
Downloads
- SPFlashTool
Windows: SP_Flash_Tool_v5.2316_WinLinux: SP_Flash_Tool_v5.2228_Linux
Podemos confirmar que as versões do SPFlashTool indicadas no link acima funcionam conforme o esperado. O uso das versões mais recentes não é nem recomendado nem desaconselhado.
Configure a máquina host (Linux ou Windows)
- Download SPFlashTool on the host machine.
- Unzip the downloaded file.
- Navigate to the unzipped folder.
- Launch SPFlashTool by running or executing the
flash_toolfile. - Enable
Auto Rebootin SPFlashTool by navigating toOptions -> Download -> Auto Reboot after Download.
Etapas para fazer o flash do /e/OS
Etapa 1: Baixe o firmware mais recente
-
Descubra o nome de código do seu dispositivo pesquisando a marca e o modelo do seu aparelho no nosso Seletor de smartphones. Por exemplo, o nome de código do smartphone Gigaset GS290 é
GS290e o nome de código do smartphone Teracube 2e éemerald -
Baixe o pacote de firmware mais recente para o seu dispositivo acrescentando o codinome a este link - https://images.ecloud.global/stable/. Por exemplo, o link para baixar o firmware do Teracube 2e (
emerald) seria - https://images.ecloud.global/stable/emerald. -
Descompacte o firmware baixado.
Etapa 2: Configure SPFlashTool
-
In SPFlashTool, choose the scatter file (
*_Android_scatter.txt) from the firmware directory unzipped in the previous step. See the screenshot below for reference.
-
Set SPFlashTool’s mode to
Firmware Upgrade. This mode resets verity, flashes the necessary images, and re-locks the device. See the screenshot below for reference.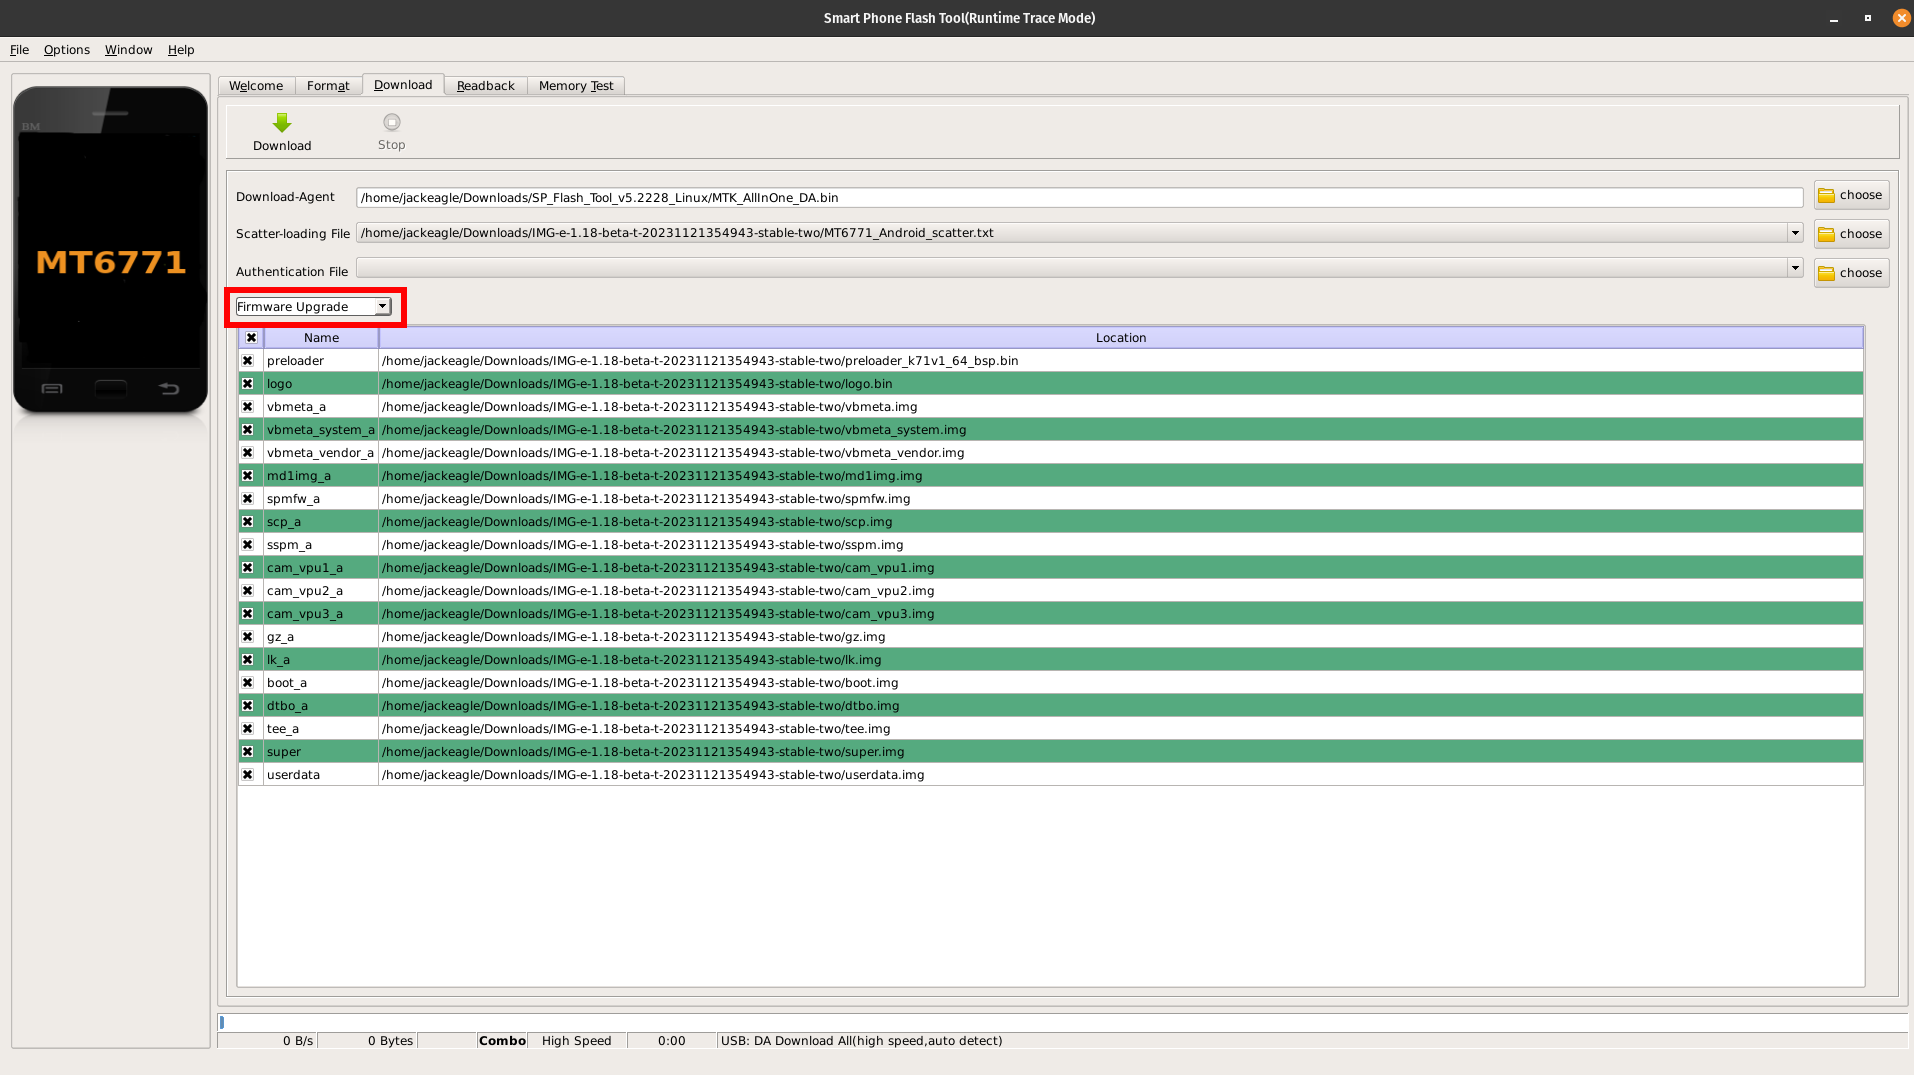
Etapa 3: Atualize o firmware
-
Start the flashing process by clicking
Downloadin SPFlashTool.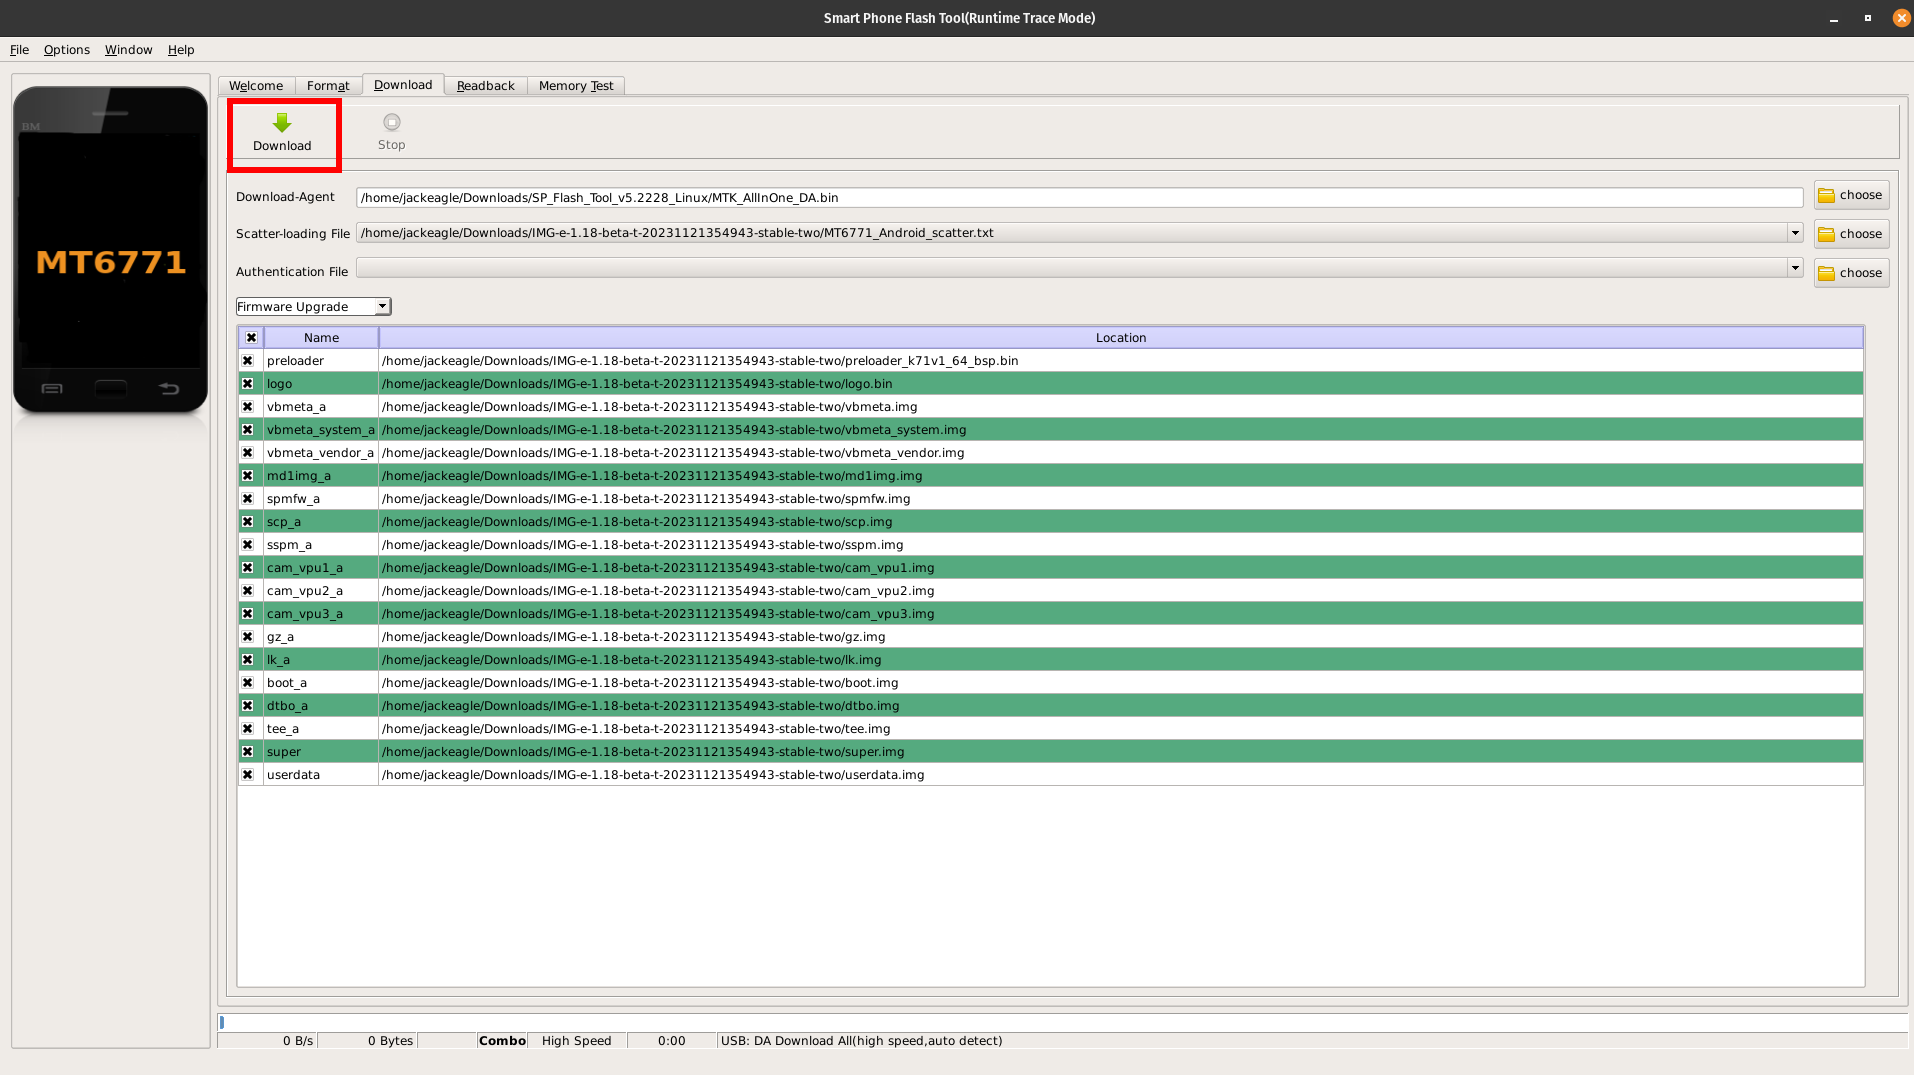
-
Desligue o dispositivo e conecte-o ao computador principal usando um cabo compatível com transferência de dados.
Tip: Use uma porta USB3 para evitar problemas de detecção. -
O processo de gravação (flashing) deve iniciar automaticamente assim que o dispositivo for detectado. Esse processo pode levar alguns minutos para ser concluído; por favor, aguarde.
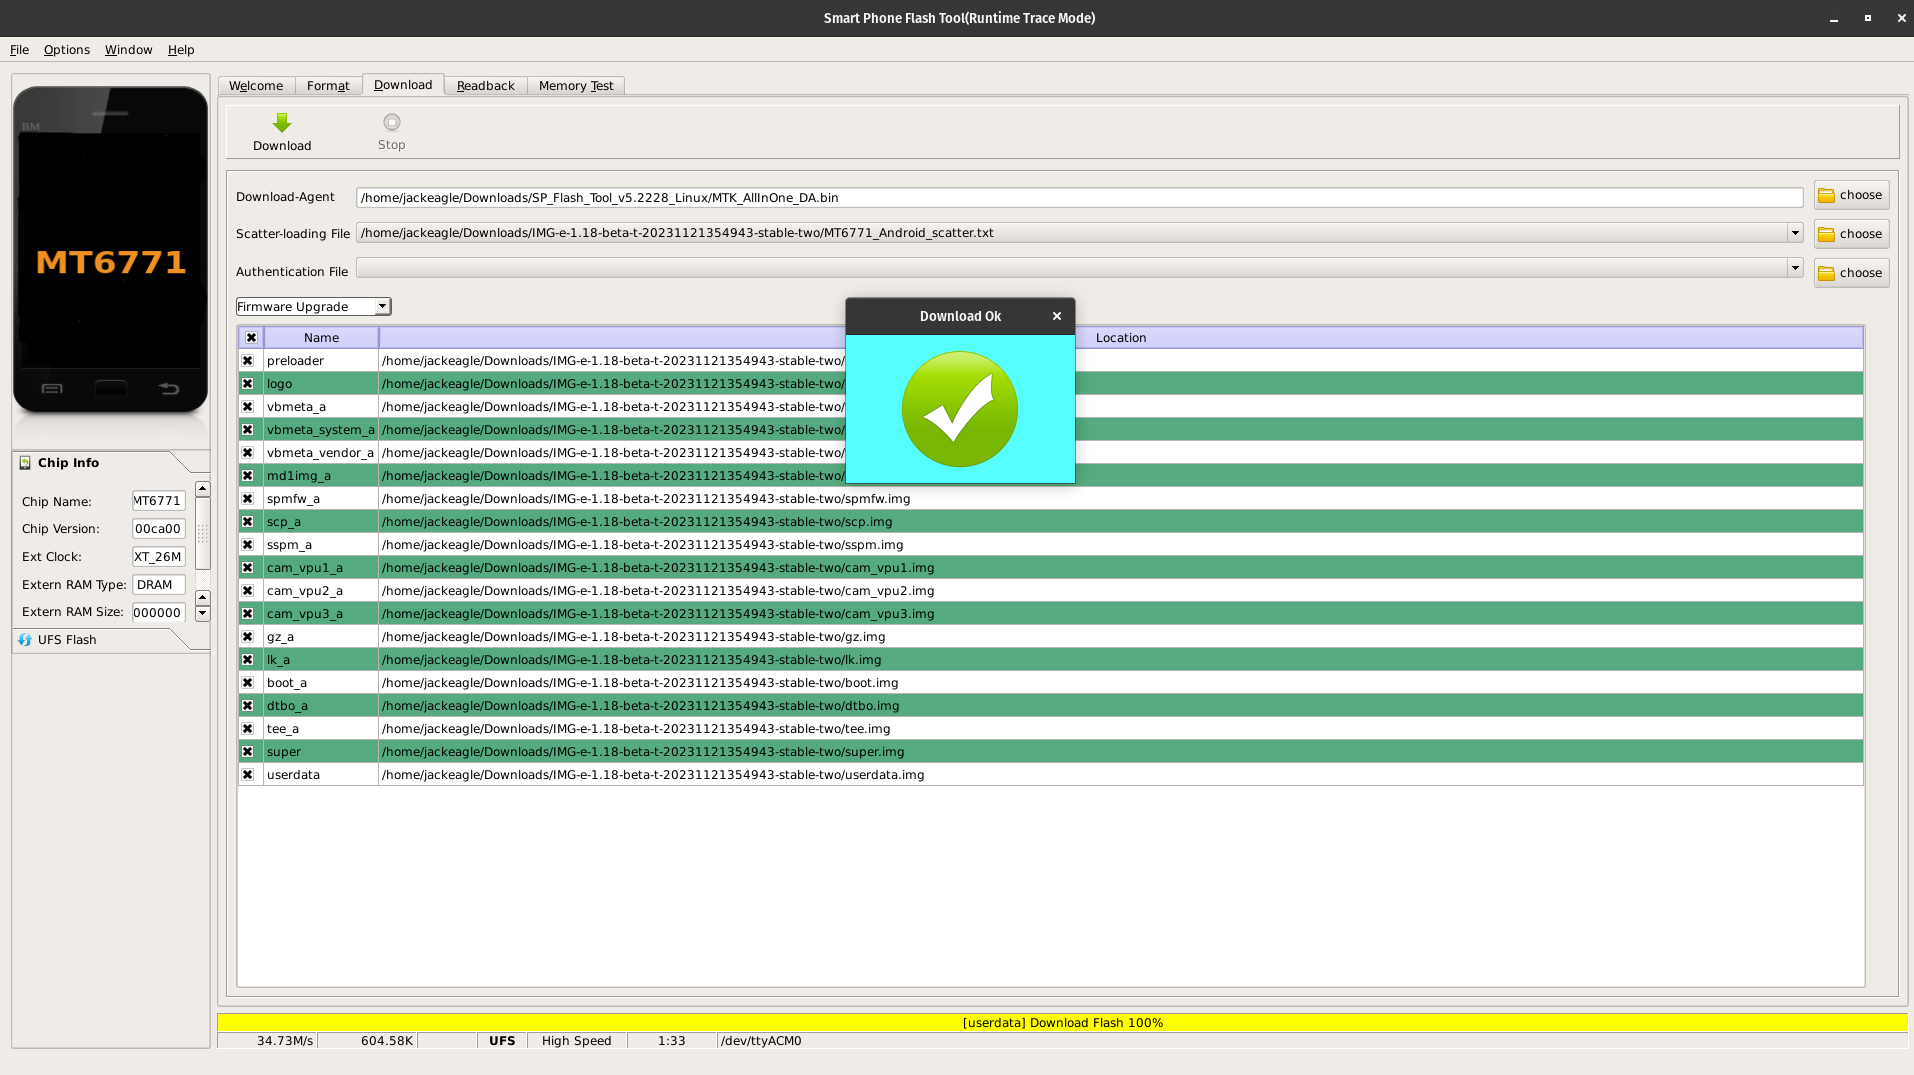
-
You’ll see a big green tick in SPFlashTool once the process is complete, and the device should reboot automatically. At this point, it’s safe to unplug the device from the host machine.
Etapa 4: Verifique a instalação
- Automatic Reboot: The device should reboot automatically after the flashing process.
- Welcome Screen: The device may take a few extra minutes to boot after a flash. Please be patient, and eventually you should see the /e/OS welcome screen.
Step 5: Enjoy!
Congratulations! Your Mediatek device is now running /e/OS. :tada: